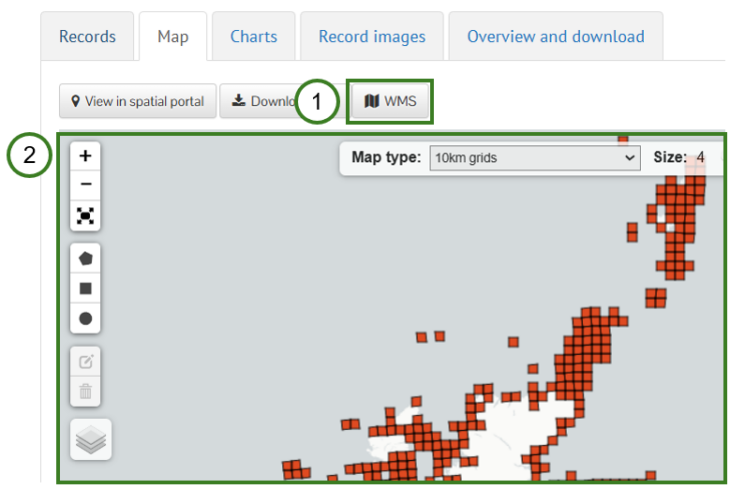
There are multiple WMS available for mapping occurrence records with external software or websites, see the full list here. The easiest way to use the WMS is to use the WMS button (1), allowing you to quickly replicate how occurrence records are displayed on the Interactive map (2). For guidance on navigating to and using the Interactive map see Using the interactive map page.
This guide will cover the content supplied by the WMS button and provide guidance on using this feature to load NBN Atlas Web Map Services (WMS) in external software, using the open GIS software QGIS as an example. Whilst this guidance uses QGIS an example, the guidance and steps should be adaptable for using the WMS with other GIS software or for an external website.
When using the WMS please be aware that occurrence records on the NBN are subject to licence conditions which you MUST adhere to and may have generalised location information, please see the Guidance on using data page for further guidance.
You may wish to use the Field Studies Council (FSC) QGIS plugin. This plugin provides a helpful interface for the NBN Atlas WMS, downloading and mapping occurrence records from the NBN Atlas from within QGIS (as well as other tools for mapping biological records). See guidance produced by FSC for NBN Atlas Tool here. Please note this is not a tool developed by the NBN Trust, therefore we aren’t likely to be able to offer direct support on any issues with this QGIS plugin.
Why use the NBN Atlas WMS
You can download occurrence records from the NBN Atlas for use in an external GIS software or website, but using the NBN Atlas WMS may be a better option depending on your use case. If you want to simply map occurrence records the WMS does not have a limitation on the number of records you can map, for stability reasons there is a 500,000 records limit for an NBN Atlas download.
The WMS button
The information supplied by the WMS button is updated to reflect any changes you have applied to occurrence records on the map, including filters and map styling applied, e.g., the Map type, size, opacity, etc.
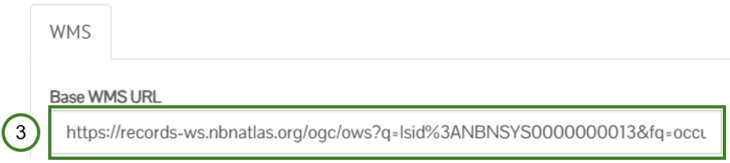
The WMS button provides the Base WMS URL (3) used for showing the occurrence records on the map, this URL does not include the parameters to copy any styling changes you have applied to the Interactive map.
Use the WMS Parameters box (4) to copy WMS parameters used for the layer styling (5) and Spatial Reference System (SRS)/Coordinate Reference System (CRS) (6). You can copy all the WMS parameters from the WMS Parameters box to your clipboard using the Copy WMS Parameters button (7).
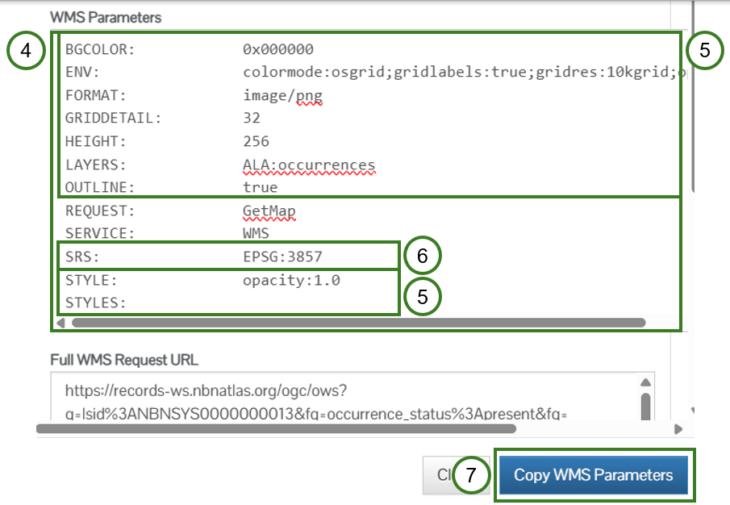
This information may be useful if you are familiar with using WMS and want to build the WMS URL yourself, to apply the same styling to another WMS, or for information on the WMS layer used on the Interactive map, e.g., the SRS/CRS being used.
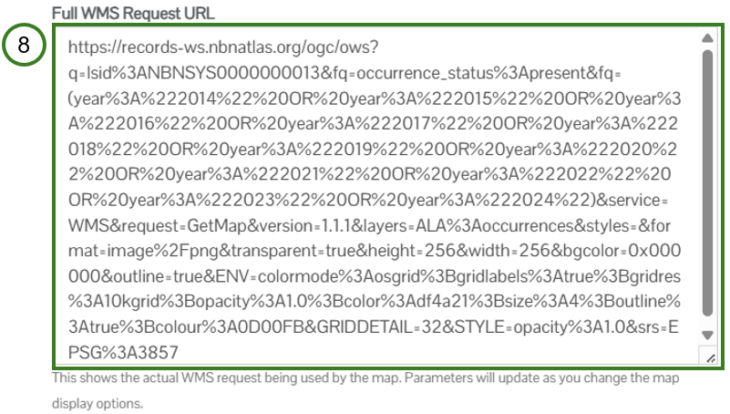
Use the Full WMS Request URL (8) for the WMS base URL with the parameters for the styling and SRS/CRS, e.g., the Map type.
Using the WMS button output in QGIS
For full guidance on using QGIS please see the User guide.
Open QGIS on your computer and make sure the Project Coordinate Reference System (CRS) is set to ‘EPSG:3857’ (see guidance on setting the Project CRS here), as this is the projection used by the NBN Atlas WMS. Then load a basemap layer, e.g., you can use the Quick Map Services plugin to access a repository of useful basemaps such as Open Streets Map.
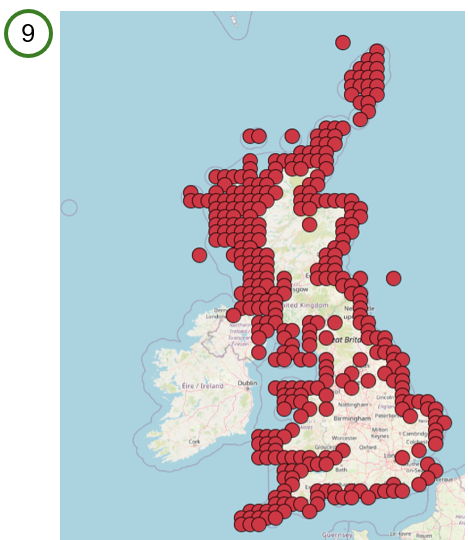
Adding a WMS layer in QGIS using the Base WMS URL will display the records as points (9)
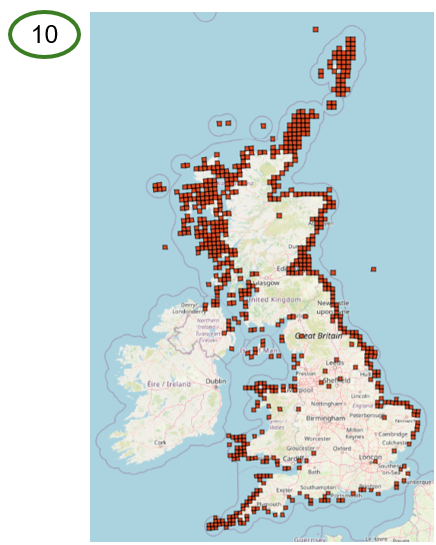
Adding a WMS layer using the Full WMS Request URL can map the occurrence records using the styling you applied for the Interactive map, i.e., Map type, size, opacity, and outline. For example, you could add a WMS layer for a 10km grid square map (10)
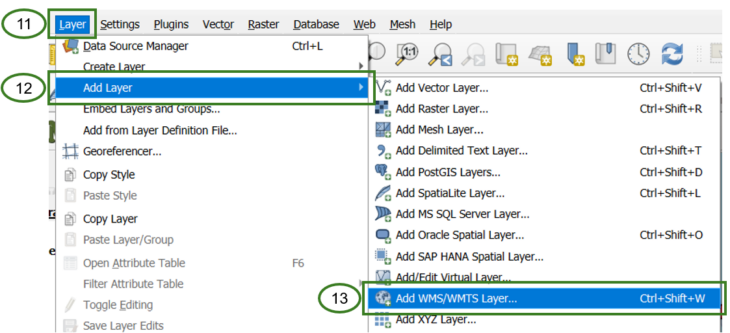
To add a WMS layer in QGIS, go to Layer (11) > Add Layer (12) > Add WMS/WMTS Layer (13) or use the keyboard shortcut, ctrl + shift + w
You will need to create a new WMS connection, click New (14)

Give the connection a useful name (15), so you can easily refer to and find the layer connection in future.

To load the WMS layer for the WMS Base URL, i.e., simply display the records as points using the NBN Atlas default colour (9), copy the WMS Base URL (3) produced by the WMS button.
To load a customised WMS with styling applied from the Interactive map e.g., (10), copy the Full WMS Request URL (8) produced by the WMS button.
Paste the WMS URL into the URL field for the WMS connection in QGIS (16)

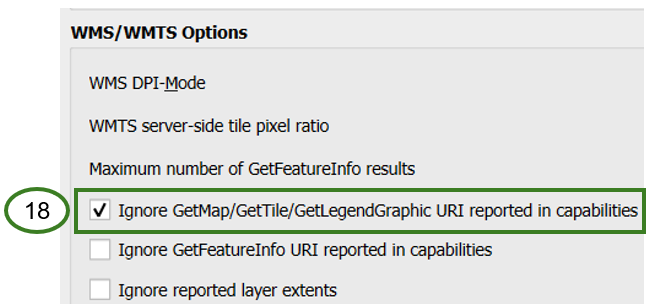
If using the WMS base URL, all checkboxes under WMS/WMTS Options should be left unchecked (17)
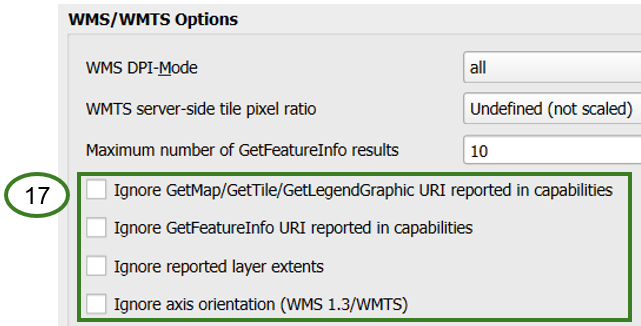
If using the Full WMS Request URL, make sure the ‘Ignore GetMap/… URI reported in capabilities’ checkbox is checked (18)
Click OK (19) to create the new connection
![]()
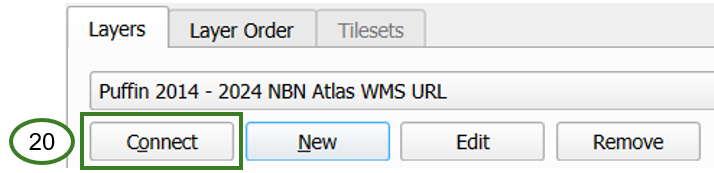
Once you have added the new WMS connection, click Connect to load the WMS connection (20)
When the connection has loaded, you can expand the child taxa for listed classification levels (21) until you expand to the classification level you want to map, e.g., species (22)

Check that the Coordinate Reference System is set to ‘EPSG:3857’ (23)

To load the WMS layer into QGIS click Add (24)

The WMS layer should now be added to your map.